Odoo能完美集成Google Calendar,因此能从两个平台上管理你的会议(同时通过两种方式更新日程)。
在Google中设定
打开 Google API平台 以生成Google Calendar API证书,然后用Google帐号登录。
选择 Calendar API 。
创建一个新项目并取名(例如Odoo)。项目用于存贮API证书。
启用API。

创建用于Odoo的证书。

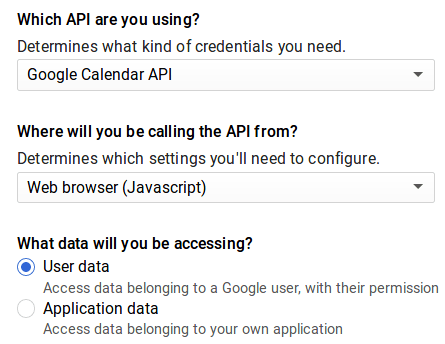
选择 Web浏览器(Javascript 作为呼叫源,选择 用户数据 作为数据类。
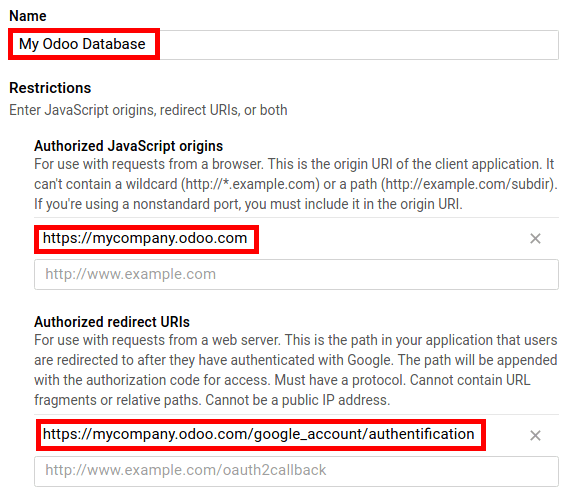
然后创建一个客户端ID。输入应用名称(例如Odoo)及你被许可重定向的页面。 授权JavaScript原点 是你的Odoo实例URL。 授权的重定向URL 是Odoo实例的URL,后接'/google_account/authentication'。
输入产品名(如Odoo)进入用户许可屏。自行勾选用户自定义选项(非必须)。只有在首次输入客户端ID时才会显示用户许可屏。
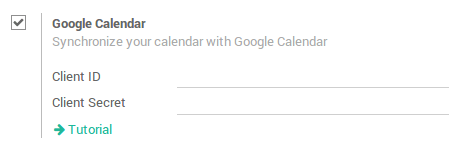
最后,你将获得一个 客户端ID 。进入 证书 窗口同时获取 客户端机密 。在Odoo应用中两者都是必需的。

设置Odoo
安装 Google Calendar 应用程序。

进入 并在Google Calender选项中输入你的证书号。
设置现已就绪。打开Odoo日历,与Google Calendar同步。首次同步时会转到Google,对链接进行授权。返回Odoo后,再次点击同步按钮。任何时候同步均可点击这个按钮。

没有理由再错过会议了哦!