Authorize.Net is one of the most popular eCommerce payment platforms in North America.
Unlike most of the other payment acquirers compatible with Odoo,
Authorize.Net can be used as payment gateway only.
That way you can use the payment processor or merchant that you like.
Create an Authorize.Net account
Set up Odoo
- Activate Authorize.Net in Odoo from .
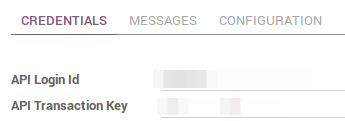
Enter both your Login ID
and your API Transaction Key.

To get those credentials in Authorize.Net, you can rely on
API Login ID and Transaction Key video of
Authorize.Net Video Tutorials.
Such videos give meaningful insights about how to set up your
Authorize.Net account according to your needs.
Go live
Your configuration is now ready!
You can make Authorize.Net visible on your merchant interface
and activate the Production mode.

Note
Credentials provided by Authorize.net are different for both
test and production mode. Don’t forget to update them in Odoo when you
turn on the production mode.
Assess Authorize.Net as payment solution
You can test and assess Authorize.Net for free by creating a developer account.
Once the account created you receive sandbox credentials.
Enter them in Odoo as explained here above and make sure
you are still in Test mode.
You can also log in to Authorize.Net sandbox platform
to configure your sandbox account.
To perform ficticious transactions you can use fake card numbers
provided in the Authorize.Net Testing Guide.


