Microsoft Azure sign-in authentication
The Microsoft Azure OAuth sign-in authentication is a useful function that allows Odoo users to sign in to their database with their Microsoft Azure account.
This is particularly helpful if the organization uses Azure Workspace, and wants employees within the organization to connect to Odoo using their Microsoft Accounts.
Warning
Databases hosted on Odoo.com should not use OAuth login for the owner or administrator of the database as it would unlink the database from their Odoo.com account. If OAuth is set up for that user, the database will no longer be able to be duplicated, renamed, or otherwise managed from the Odoo.com portal.
Configuration
Integrating the Microsoft sign-in function requires configuration on Microsoft and Odoo.
Odoo System Parameter
First activate the developer mode, and then go to .
Click Create and on the new/blank form that appears, add the following system parameter
auth_oauth.authorization_header to the Key field, and set the Value to
1. Then click Save to finish.
Microsoft Azure dashboard
Create a new application
Now that the system parameters in Odoo have been set up, it’s time to create a corresponding application inside of Microsoft Azure. To get started creating the new application, go to Microsoft’s Azure Portal. Log in with the Microsoft Outlook Office 365 account if there is one, otherwise, log in with a personal Microsoft account.
Important
A user with administrative access to the Azure Settings must connect and perform the following configuration steps below.
Next, navigate to the section labeled Manage Azure Active Directory. The location of this link is usually in the center of the page.
Now, click on the Add (+) icon, located in the top menu, and then select App
registration from the drop-down menu. On the Register an application screen, rename the
Name field to Odoo Login OAuth or a similarly recognizable title. Under the
Supported account types section select the option for Accounts in this
organizational directory only (Default Directory only - Single tenant).
Under the Redirect URL section, select Web as the platform, and then input
https://<odoo base url>/auth_oauth/signin in the URL field. The Odoo base URL is the canonical domain at which your Odoo instance can be reached (e.g.
mydatabase.odoo.com if you are hosted on Odoo.com) in the URL field. Then, click
Register, and the application is created.
Authentication
Edit the new app’s authentication by clicking on the Authentication menu item in the left menu after being redirected to the application’s settings from the previous step.
Next, the type of tokens needed for the OAuth authentication will be chosen. These are not currency tokens but rather authentication tokens that are passed between Microsoft and Odoo. Therefore, there is no cost for these tokens; they are used merely for authentication purposes between two APIs. Select the tokens that should be issued by the authorization endpoint by scrolling down the screen and check the boxes labeled: Access tokens (used for implicit flows) and ID tokens (used for implicit and hybrid flows).
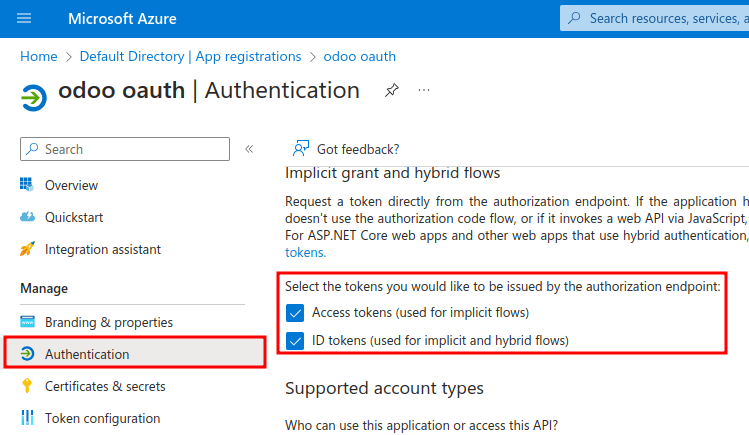
Click Save to ensure these settings are saved.
Gather credentials
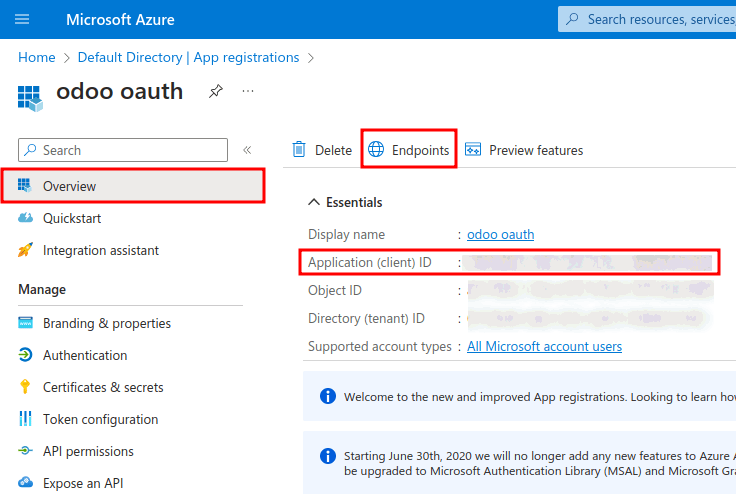
With the application created and authenticated in the Microsoft Azure console, credentials will be gathered next. To do so, click on the Overview menu item in the left-hand column. Select and copy the Application (client) ID in the window that appears. Paste this credential to a clipboard / notepad, as this credential will be used in the Odoo configuration later.
After finishing this step, click on Endpoints on the top menu and click the copy icon next to OAuth 2.0 authorization endpoint (v2) field. Paste this value in the clipboard / notepad.
The value should equal https://login.microsoftonline.com/<directory_id>/oauth2/v2.0/authorize.
Replace the <directory_id> with the Directory (tenant) ID under the
Essentials section of the Overview page if it is not already present in the URL.
Example
Should the Directory (tenant) ID be equal to 6729e9df-afbb-4522-a876-f1408d416396
then the new value of the OAuth 2.0 authorization endpoint (v2) URL should be:
https://login.microsoftonline.com/6729e9df-afbb-4522-a876-f1408d416396/oauth2/v2.0/authorize.
Odoo setup
Finally, the last step in the Microsoft Azure OAuth configuration is to configure some settings in Odoo. Navigate to and check the box to activate the OAuth login feature. Click Save to ensure the progress is saved. Then, sign in to the database once the login screen loads.
Once again, navigate to and
click on OAuth Providers. Now, select New in the upper-left corner and name
the provider Azure.
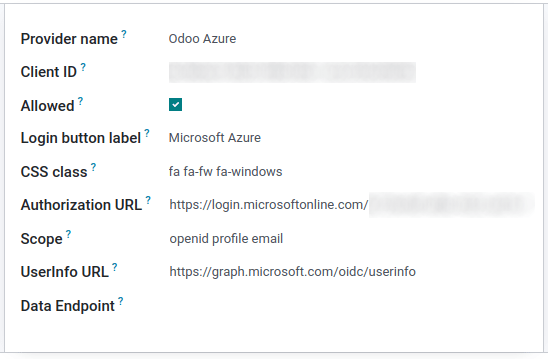
Paste the Application (client) ID from the previous section into the Client ID field. After completing this, paste the new OAuth 2.0 authorization endpoint (v2) value into the Authorization URL field.
For the UserInfo URL field, paste the following URL:
https://graph.microsoft.com/oidc/userinfo
In the Scope field, paste the following value: openid profile email. Next, the Windows
logo can be used as the CSS class on the login screen by entering the following value: fa fa-fw
fa-windows, in the CSS class field.
Check the box next to the Allowed field to enable the OAuth provider. Finally, add
Microsoft Azure to the Login button label field. This text will appear next to the
Windows logo on the login page.
Save the changes to complete the OAuth authentication setup in Odoo.
User experience flows
For a user to log in to Odoo using Microsoft Azure, the user must be on the . This is the only way that Odoo is able to link the Microsoft Azure account and allow the user to log in.
Note
Existing users must reset their password to access the . New Odoo users must click the new user invitation link that was sent via email, then click on Microsoft Azure. Users should not set a new password.
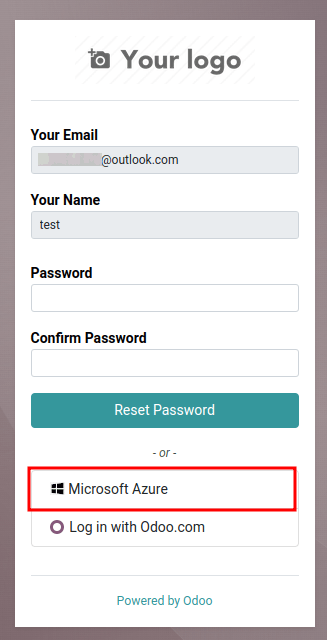
To sign in to Odoo for the first time using the Microsoft Azure OAuth provider, navigate to the (using the new user invitation link). A password reset page should appear. Then, click on the option labeled Microsoft Azure. The page will redirect to the Microsoft login page.
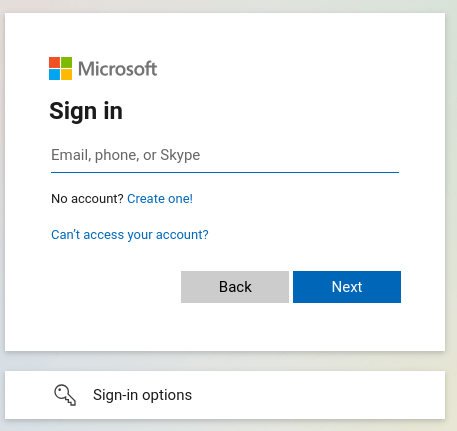
Enter the Microsoft Email Address and click Next. Follow the process to sign in to the account. Should 2FA be turned on, then an extra step may be required.
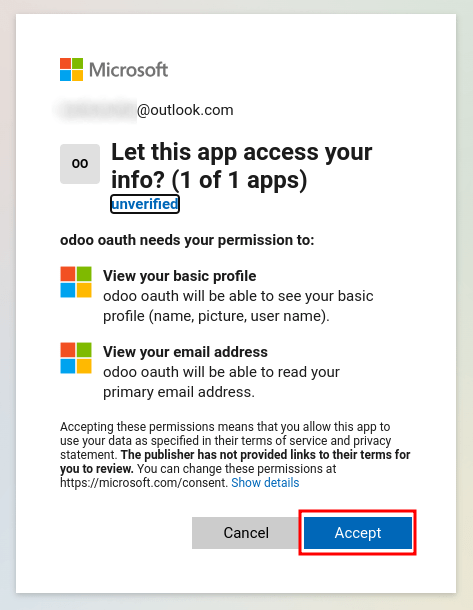
Finally, after logging in to the account, the page will redirect to a permissions page where the user will be prompted to Accept the conditions that the Odoo application will access their Microsoft information.
