Checkout
You can customize the checkout steps, add more content using the website builder, and enable additional features such as express checkout and sign in/up at checkout.
You can use building blocks to add content at any step of the checkout process. To do so, from any checkout page, go to , and drag and drop building blocks to the page.
Note
Note that content added through building blocks is specific to each step.
Checkout steps
Review order: promo code (and subtotal)
If you have enabled Discounts, Loyalty, & Gift Card in the settings (), you can enable the Promo Code field () from any checkout page. Customers can then redeem gift cards and promotional codes at the Review Order step.
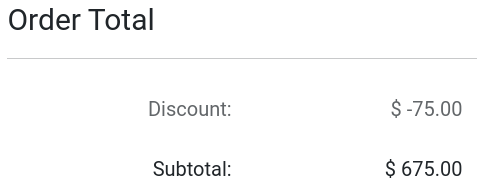
Furthermore, you can display the subtotal with discounts applied by enabling Show Discount in Subtotal.

Address: B2B fields
Optional TIN/VAT and Company Name fields can be added to the Billing Address form for B2B customers, at the Address step. To add the fields, go to from any checkout page, and enable Show B2B fields.
Request extra info (additional step)
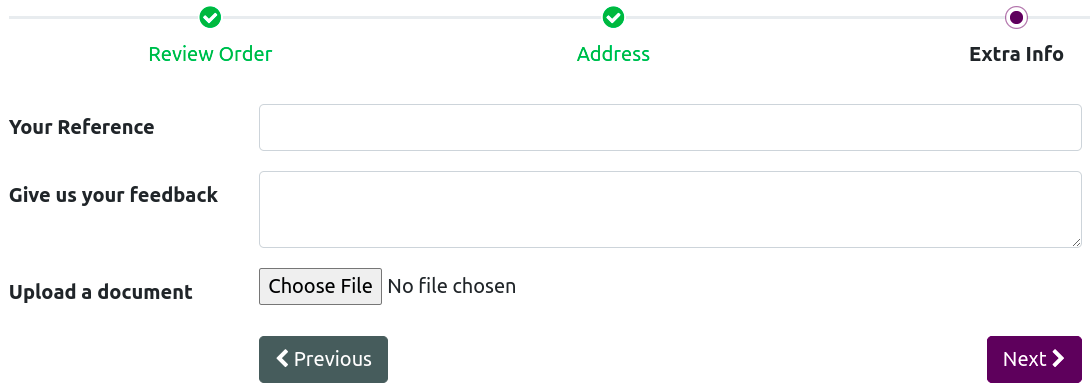
You can request Extra Info from the customer by adding an Extra Info step between the Address and Confirm Order steps. To do so, go to from any checkout page, and enable Extra Step Option.

The Extra Info step is an online form linked to the quotation or sales order of the customer. The information added during that step can be found on the quotation or sales order of the customer from the back end, in the Sales app.
When enabled, you can remove, add, and modify fields of the form by clicking on Edit in the top-right corner, and then clicking on any of the form’s fields. All customization options, as well as the + Field button to add new fields, are available at the bottom of the Customize menu under the Field section.

Confirm order: terms and conditions
You can ask customers to agree to the Terms & Conditions in order to confirm their order by enabling Accept Terms & Conditions under on any checkout page.

Express checkout
You can enable a Buy Now button on products’ pages which instantly takes the customer to the Confirm Order checkout page, instead of adding the product to the cart. To do so, go to and tick Buy Now. Alternatively, the Buy Now button can also be enabled from any product’s page by going , in the Cart section.
The button can be found next to the Add to Cart button on the product’s page.

Guest and signed-in checkout
It is possible to introduce a checkout policy under which customers can either checkout as guests or signed-in users only. Customers can also checkout as guest, and optionally sign up later in order to track their order, if enabled.
To select a policy, go to . You can choose between:
Optional: allows guests to checkout and later register from the order confirmation email to track their order;
Disabled (buy as guest): customers can only checkout as guests;
Mandatory (no guest checkout): customers can only checkout if they have signed-in.
See also
B2B access restriction
If you wish to restrict checkout only to selected B2B customers, enable Mandatory (no guest checkout) and go to . Select the customer you wish to grant access to, click , and click Grant Access.
Tip
Settings are website-specific, which means you can set up a B2C website allowing guest checkout, and another for B2B customers with mandatory sign-in.
Note
Users can only have one portal access per email. They cannot be granted access to two different portals with the same email address.
