Payroll configuration
Odoo Payroll is used to process work entries and create payslips for employees, including both regular pay and commission. Payroll works in conjunction with other Odoo apps, such as Employees, Timesheets, Time Off, and Attendances.
The Payroll app helps ensure there are no issues or conflicts when validating work entries, handles country-specific localizations to ensure that payslips follow local rules and taxes, and allows for salary assignments. Payroll configuration is critical to ensure accurate and timely processing of payslips.
Settings
To access the Settings, go to . Whether or not payslips are posted in accounting, and whether SEPA payments are created, is selected here.
The Settings screen is where localization settings are configured. Localizations are country-specific settings pre-configured in Odoo at the creation of the database, and account for all taxes, fees, and allowances for that particular country. The Localization section of the Settings includes a detailed view of all benefits provided to employees.
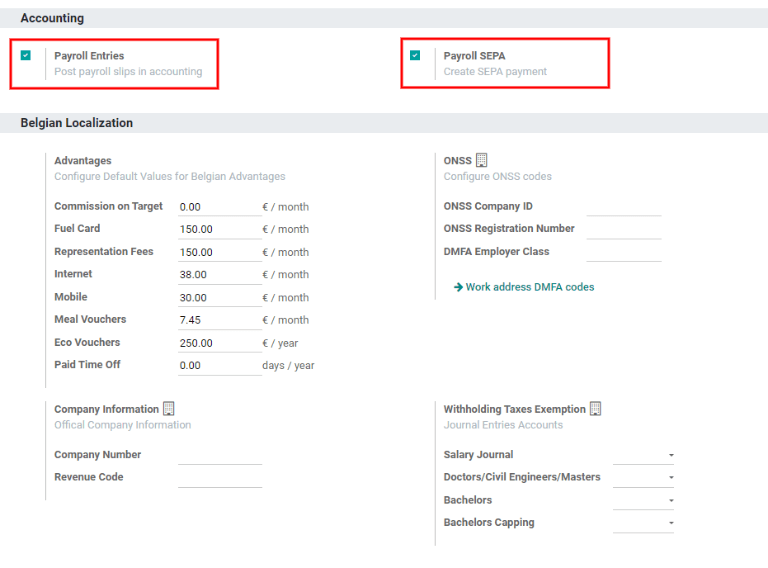
Any country-specific localizations are set up in the Localization section of the Settings screen. All localization items are pre-populated when the country is specified during the creation of the database. It is not recommended to alter the localization settings unless specifically required.
Work entries
A work entry is an individual record on an employee’s timesheet. Work entries can be configured to account for all types of work and time off, such as Attendance, Sick Time Off, Training, or Public Holiday.
Work entry types
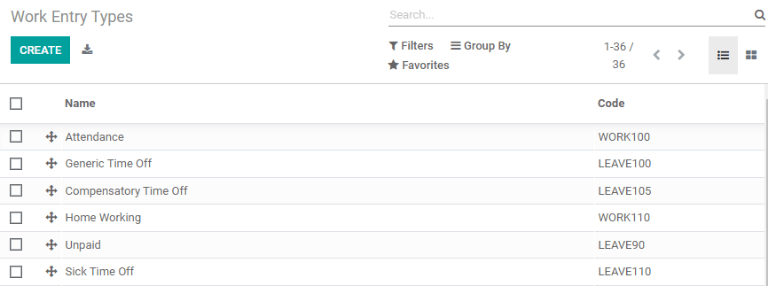
When creating a work entry in the Payroll application, or when an employee enters information in the Timesheets application, a Work Entry Type needs to be selected. The list of Work Entry Types is automatically created based on localization settings set in the database.
To view the current work entry types available, go to .
Each work entry type has a code to aid in the creation of payslips, and ensure all taxes and fees are correctly entered.
New work entry type
To create a new work entry type, click the Create button. Enter the information on the form:
Work Entry Type Name: The name should be short and descriptive, such as
Sick TimeorPublic Holiday.Code: This code appears with the work entry type on timesheets and payslips. Since the code is used in conjunction with the Accounting application, it is advised to check with the accounting department for a code to use.
Sequence: The sequence determines the order that the work entry is computed in the payslip list.
Check boxes: If any of the items in the list applies to the work entry, check off the box by clicking it. If Time Off is checked off, a Time Off Type field appears. This field has a drop-down menu to select the specific type of time off, or a new type of time off can be entered.
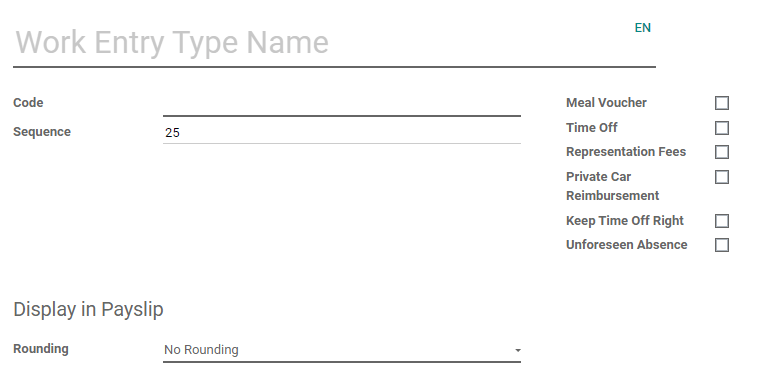
Rounding: The rounding method determines how timesheet entries are displayed on the payslip.
No Rounding: A timesheet entry is not modified.
Half Day: A timesheet entry is rounded to the closest half day amount.
Day: A timesheet entry is rounded to the closest full day amount.
Example
If the working time is set to an 8-hour work day (40-hour work week), and an employee enters a time of 5.5 hours on a timesheet, and Rounding is set to No Rounding, the entry remains 5.5 hours. If Rounding is set to Half Day, the entry is changed to 4 hours. If it is set to Day, it is changed to 8 hours.
Working times
To view the currently configured working times, go to . The working times that are available for an employee’s contracts and work entries are found in this list.
Working times are company-specific. Each company must identify each type of working time they use. For example, an Odoo database containing multiple companies that use a standard 40-hour work week needs to have a separate working time entry for each company that uses the 40-hour standard work week.

New working time
To create a new working time, click the Create button. Enter the information on the form.
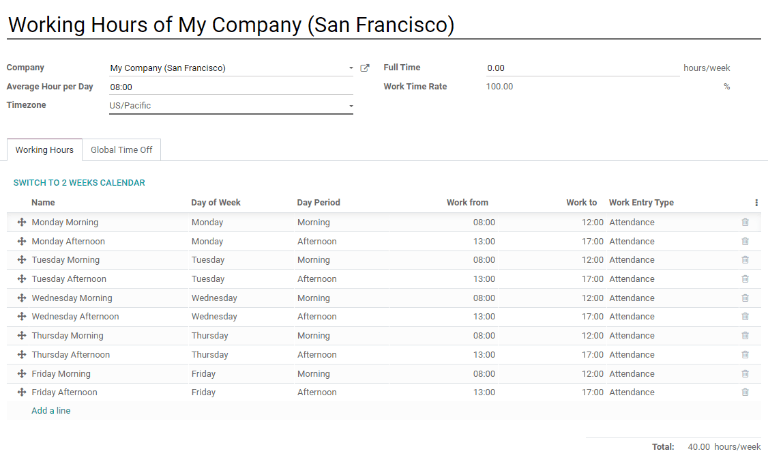
The fields are auto-populated for a regular 40-hour work week but can be modified. First, change the name of the working time by modifying the text in the Name field. Next, make any adjustments to the days and times that apply to the new working time.
In the Working Hours tab, modify the Day of Week, Day Period, and Work Entry Type selections by clicking on the drop-down menus in each column and making the desired selection. The Work From and Work To columns are modified by typing in the time.
注解
The Work From and Work To times must be in a 24-hour format. For example,
2:00 PM would be entered as 14:00.
If the working time should be in a two-week configuration, click the Switch To 2 Week Calendar button. This creates entries for an Even week and an Odd week.
Salary
Structure types
In Odoo, an employee’s payslip is based on structures and structure types, which both affect how an employee enters timesheets. Each structure type is an individual set of rules for processing a timesheet entry, which consists of different structures nested within it. Structure types define how often an employee gets paid, the working hours, and if wages are based on a salary (fixed) or how many hours the employee worked (varied).
For example, a structure type could be Employee, and that structure type could have two different
structures in it: a Regular Pay structure which includes all the separate rules for processing
regular pay, as well as a structure for an End of Year Bonus which includes the rules only for the
end of year bonus. Both the Regular Pay structure and End of Year Bonus structure are structures
within the Employee structure type.
The different structure types can be seen by going to .
There are two default structure types configured in Odoo: Employee and Worker. Typically, Employee is used for salaried employees, which is why the wage type is Monthly Fixed Wage, and Worker is typically used for employees paid by the hour, so the wage type is Hourly Wage.

Click the Create button to make a new structure type. Most fields are pre-populated, but all fields can be edited. Once the fields are edited, click the Save button to save the changes, or click Discard to delete the entry.

Structures
Salary structures are the different ways an employee gets paid within a specific structure, and are specifically defined by various rules.
The amount of structures a company needs for each structure type depends on how many different ways
employees are paid, and how their pay is calculated. For example, a common structure that could be
useful to add may be a Bonus.
To view all the various structures for each structure type, go to .

Each structure type lists the various structures associated with it. Each structure contains a set of rules that define it.
Click on a structure to view its Salary Rules. These rules are what calculate the payslip for the employee.
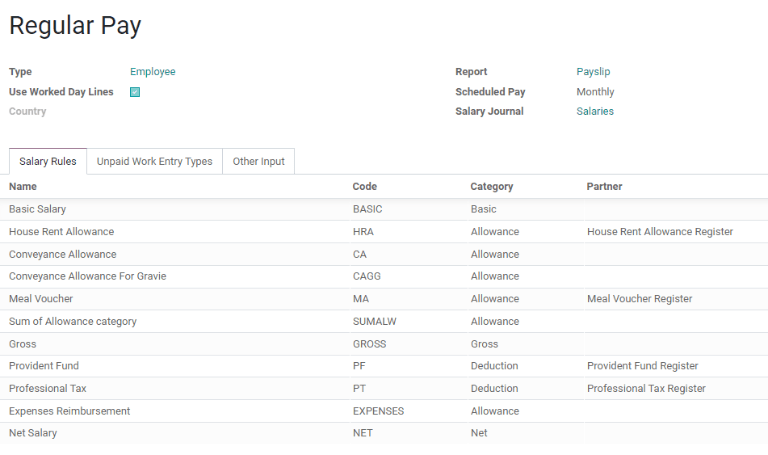
Rules
Each structure has a set of salary rules to follow for accounting purposes. These rules are configured by the localization, and affect the Accounting application, so modifications to the default rules, or the creation of new rules, should only be done when necessary.
To view all the rules, go to . Click on a structure (such as Regular Pay) to view all the rules.

To make a new rule, click Create. A new rule form appears. Enter the information in the fields, then click Save.
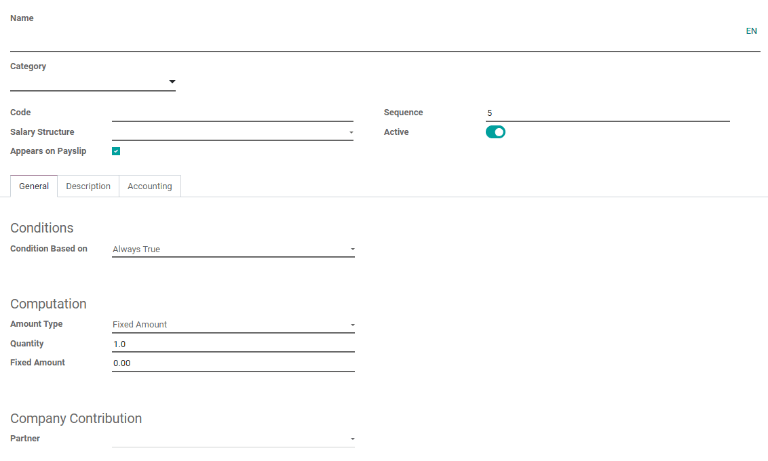
The required fields for a rule are:
Name: Enter a name for the rule.
Category: Select a category the rule applies to from the drop-down menu, or enter a new one.
Code: Enter a code to be used for this new rule. It is recommended to coordinate with the accounting department for a code as this will affect them.
Salary Structure: Select a salary structure the rule applies to from the drop-down menu, or enter a new one.
Condition Based on: In the General tab, select from the drop-down menu whether the rule is Always True (always applies), a Range (applies to a specific range, which is entered beneath the selection), or a Python Expression (the code is entered beneath the selection).
Amount Type: In the General tab, select from the drop-down menu whether the amount is a Fixed Amount, a Percentage (%), or a Python Code. Depending on what is selected, the fixed amount, percentage, or Python code needs to be entered next.
Rule parameters
注解
Currently, the Rule Parameters feature found inside the menu is still in development and only serves a specific use case for Belgian markets. The documentation will be updated when this section has matured to more markets.
Other input types
When creating payslips, it is sometimes necessary to add other entries for specific circumstances, like expenses, reimbursements, or deductions. These other inputs can be configured by going to .

To create a new input type, click the Create button. Enter the Description, the Code, and which structure it applies to in the Availability in Structure field. Click the Save button to save the changes, or click Discard to delete the entry.

Salary package configurator
The various options under the Salary Package Configurator section of the menu all affect an employee’s potential salary. These sections (Advantages, Personal Info, and Resume) specify what benefits can be offered to an employee in their salary package.
Depending on what information an employee enters (such as deductions, dependents, etc.), their salary is adjusted accordingly. When an applicant applies for a job on the company website, the sections under Salary Package Configurator directly affect what the applicant sees, and what is populated as the applicant enters information.
Advantages
When offering potential employees a position, there can be certain advantages set in Odoo in addition to the salary to make the offer more appealing (such as extra time off, access to a company car, reimbursement for a phone or internet, etc.).
To see the advantages, go to . Advantages are grouped by Structure type.

To make a new advantage, click the Create button. Enter the information in the fields, then click the Save button to save the changes, or click Discard to delete the entry.
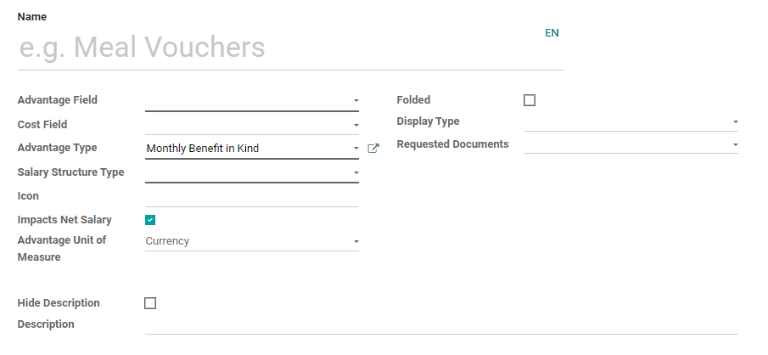
The required fields for an advantage are:
Name: Enter the name for the advantage.
Advantage Field: Select from the drop-down menu what field in the payslip this advantage appears under.
Advantage Type: Select from the drop-down menu what type of advantage the benefit is. Select from Monthly Benefit in Kind, Monthly Advantages in Net, Monthly Advantages in Cash, or Yearly Advantages in Cash.
Salary Structure Type: Select from the drop-down menu which salary structure type this advantage applies to.
Personal info
Every employee in Odoo has an employee card that includes all of their personal information, resume, work information, and documents. To view an employee’s card, go to the main app dashboard, and click on the employee’s card, or go to and click on the employee’s card. Employee cards can also be viewed by going to the app.
注解
An employee card can be thought of as an employee personnel file.
The Personal Information section lists all of the fields that are available to enter on the employee’s card. To access this section, go to .
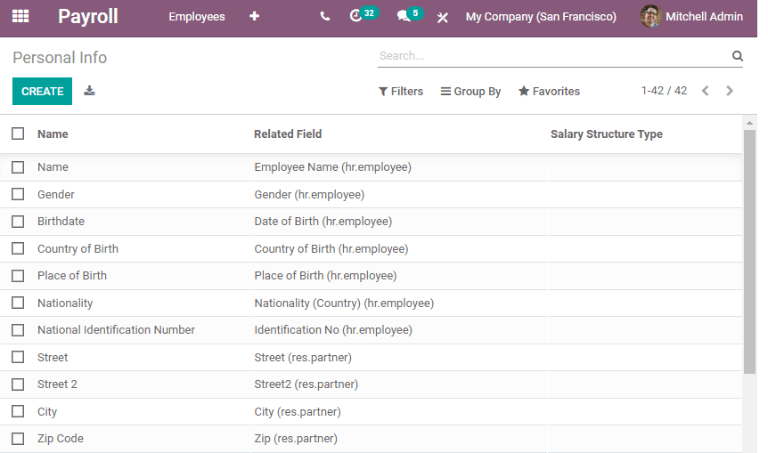
To edit an entry, select it from the list. Then, click the Edit button, and modify the entry. When done, click Save or Discard to save the information or cancel the edits.
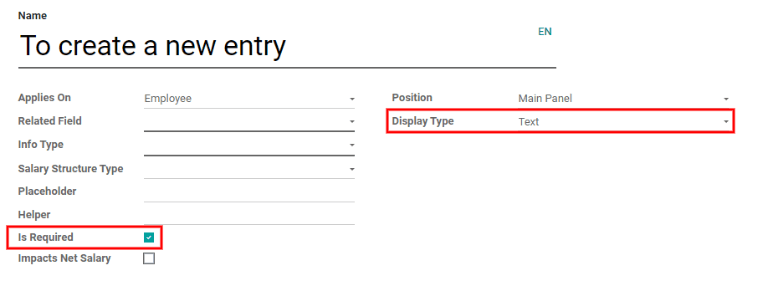
The two most important fields on the personal info form are Is Required and Display Type. Checking the Is Required box makes the field mandatory on the employee’s card.
The Display Type drop-down menu allows for the information to be entered in a variety of ways, from a Text box, to a customizable Radio button, a Checkbox, a Document, and more.
Once the information is entered, click the Save button to save the entry.
Resume
注解
Currently, the Resume feature found inside the menu is still in development and only serves a specific use case for Belgian markets. The documentation will be updated when this section has matured to more markets.
