云端储存空间
The cloud storage integration allows to store chatter and email attachments on the Google Cloud or Microsoft Azure platform instead of the database’s server.
The module can be used to prevent large files from being uploaded to and downloaded from a database’s server or when a database requires more data storage.
注解
Files generated by Odoo (e.g., sales orders) and Documents/Sign app files are always stored on the database’s server.
A database’s storage limit depends on its hosting solution:
Odoo Online: 100 GB
Odoo.sh:
Shared hosting: 512 GB
Dedicated hosting: 4 TB
On-premise: limited by the infrastructure in place.
Google Cloud云
首先,注册并登录到 Google Cloud 。
Service account
在 Google Cloud 控制台打开导航侧栏,然后转到 。
Define a Service account name, click Create and continue, then Done.
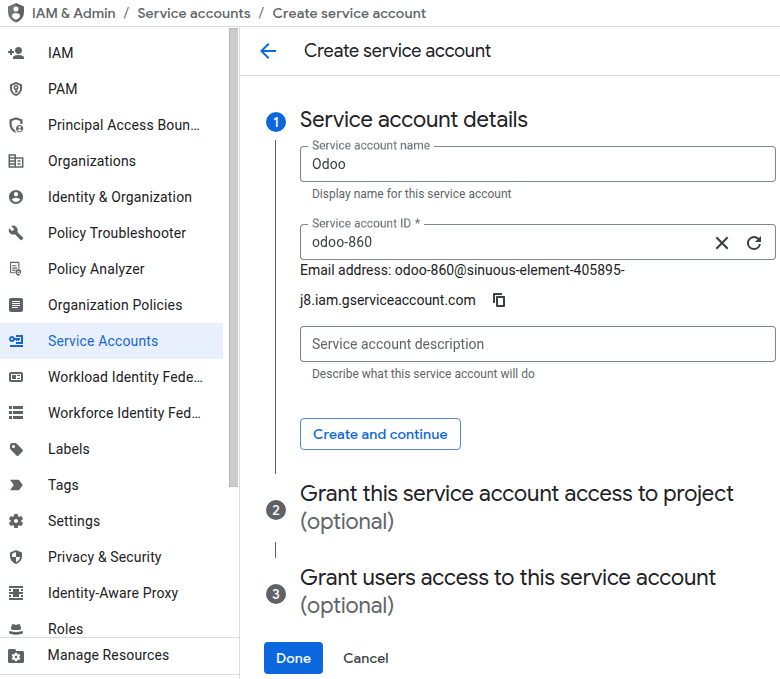
Note down the service account’s Email as it will be used during the cloud storage bucket configuration.
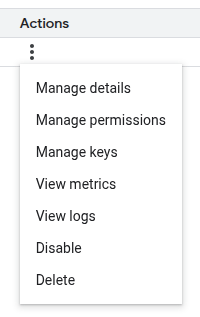
Click the (Actions) button, then select Manage keys.
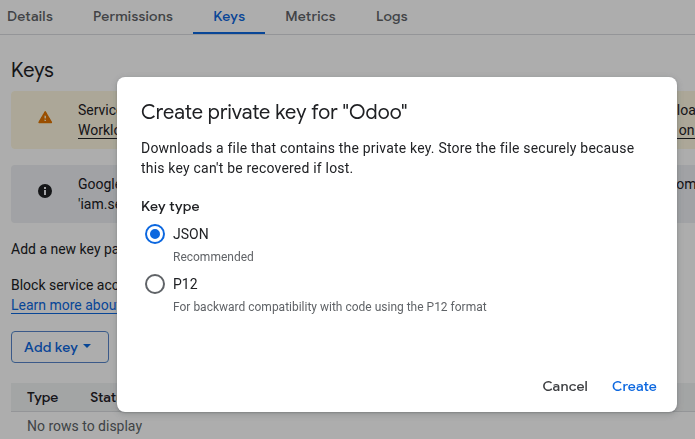
Go to , select JSON as the Key type, and click Create. Store the downloaded JSON file containing the key securely. It will be used when configuring Odoo.
Cloud storage bucket
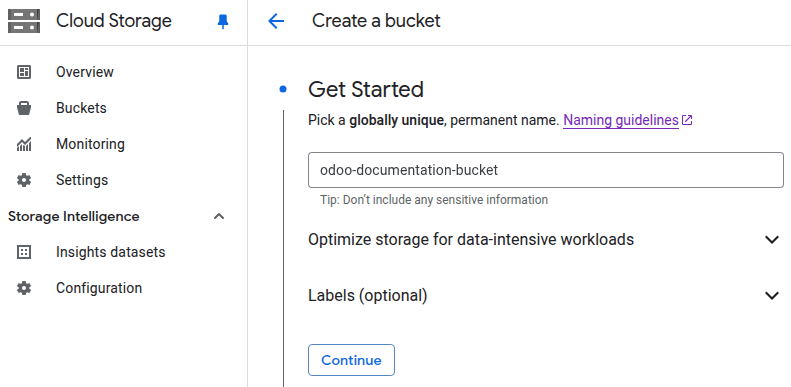
Open the navigation sidebar on the Google Cloud console, then go to .
Enter a bucket name following the bucket naming guidelines and note it down as it will be used when configuring Odoo.
Configure the bucket as desired and click Create when done.
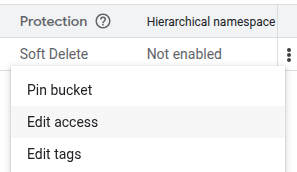
Click the (More actions) button, then select Edit access.
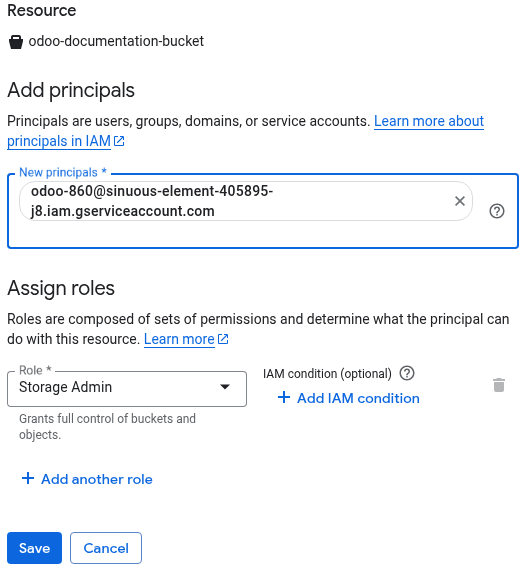
Click Add principal and paste the service account’s email in the New principals field.
Select Storage Admin as Role under the Cloud Storage section and click Save.
Odoo 配置
Install the Cloud Storage Google module.
Open the Settings app and select Cloud Storage in the navigation sidebar.
Select Google Cloud Storage as the Cloud Storage Provider for new attachments.
Enter the Google Bucket Name as previously set.
Click Upload your file next to Google Service Account Key and select the downloaded JSON file.
Set a Minimum File Size (bytes) for attachments to be stored on Google Cloud.
Microsoft Azure
First, register and sign it to Microsoft Azure.
App registration
On the Microsoft Azure portal, search for the App registrations service and open it.
Click New registration, enter an application Name, select Accounts in any organizational directory (Any Microsoft Entra ID tenant - Multitenant) under Supported account types, and click Register.
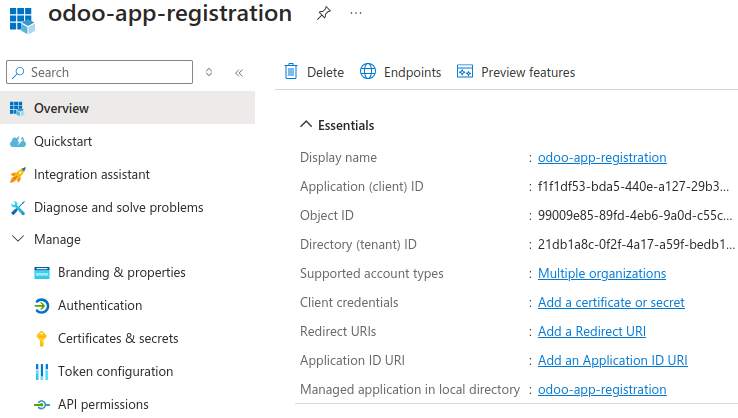
Note down the Application (client) ID and Directory (tenant) ID as they will be used when configuring Odoo.
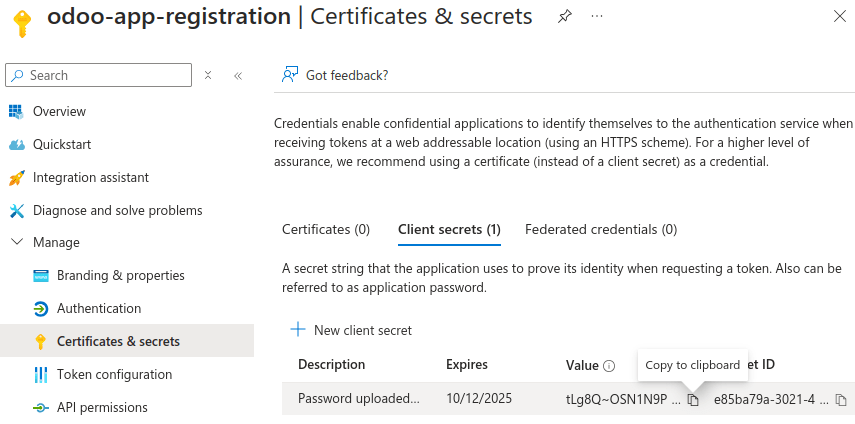
Click Add a certificate or secret next to Client credentials, click New client secret, then Add.
重要
For security reasons, leave the Expires field on
180 days (6 months)or choose a shorter expiration interval. Before the secret expires, adding a new client secret and updating Odoo’s configuration with the new value is necessary.Copy the client secret’s Value and store it securely. It will be used when configuring Odoo.
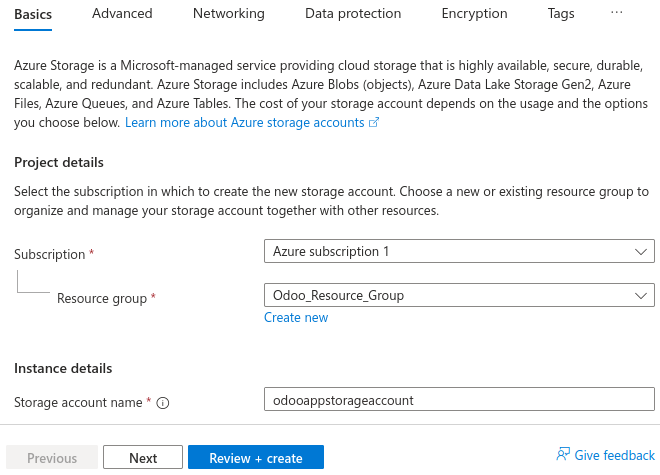
Storage account
Search for the Storage accounts service, open it, and click Create.
Click Create new below the Resource group field, enter a Name, and click OK.
Enter a unique Storage account name and note it down as it will be used when configuring Odoo.
Configure the storage account as desired, and, when done, click Review + create, then Create.
Container
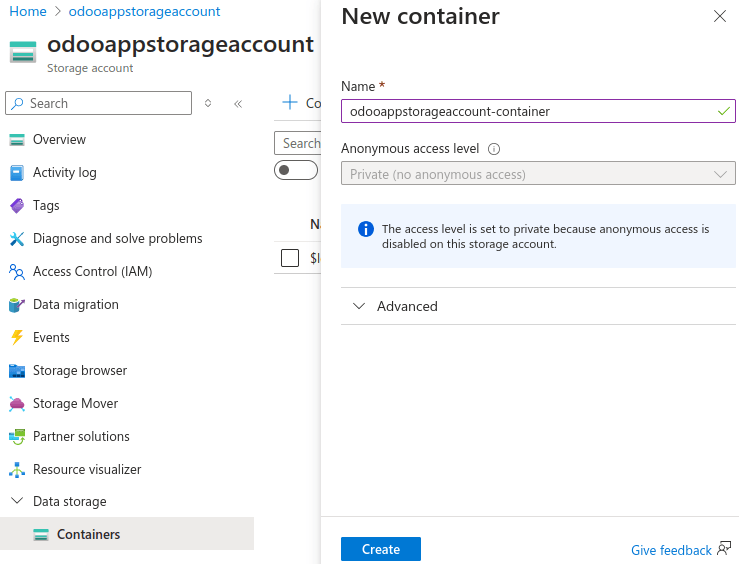
Open your storage account resource, for example by searching for its name, and select Containers under Data storage in the navigation sidebar.
Enter a Name, note it down as it will be used when configuring Odoo, and click Create.
Resource sharing
Select Resource sharing (CORS) under Settings on the storage account’s navigation sidebar.
Create a first CORS blob service rule:
Allowed origins:
*Allowed methods:
GETAllowed headers:
Content-TypeExposed headers:
Content-TypeMax age:
0
Create a second CORS blob service rule and click Save:
Allowed origins:
*Allowed methods:
PUTAllowed headers:
content-type,x-ms-blob-typeExposed headers:
content-type,x-ms-blob-typeMax age:
0

Role assignment
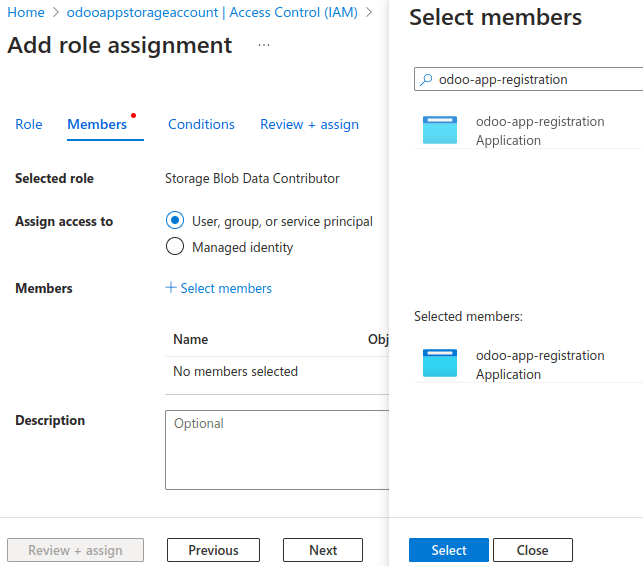
Select Access control (IAM) on the storage account’s navigation sidebar, then click Add and select Add role assignment.
Search for Storage Blobs Data Contributor and click Next.
注解
To remove the unnecessary
deletepermission, create a custom role and search for the custom role’s name instead.Click Select members, enter the name of the previously registered application, select it, and click Select.
Click Review + assign twice.
Custom role
注解
This step is optional. However, removing the delete permission would prevent anyone
managing to access the cloud storage’s credentials from deleting files.
Open your subscription resource, for example by searching for its name, select Access control (IAM) in the navigation sidebar, click Add and select Add custom role.
Select the JSON tab and click Edit. Copy the code below, add your
subscription-idunderassignableScopesand change theroleName(Custom role) if desired, paste it, and click Save.
{
    "properties": {
        "roleName": "Custom role",
        "description": "",
        "assignableScopes": [
            "/subscriptions/subscription-id"
        ],
        "permissions": [
            {
                "actions": ["Microsoft.Storage/storageAccounts/blobServices/generateUserDelegationKey/action"],
                "notActions": [],
                "dataActions": ["Microsoft.Storage/storageAccounts/blobServices/containers/blobs/read", "Microsoft.Storage/storageAccounts/blobServices/containers/blobs/add/action"],
                "notDataActions": []
            }
        ]
    }
}
Odoo 配置
Install the Cloud Storage Azure module.
Open the Settings app and select Cloud Storage in the navigation sidebar.
Select Azure Cloud Azure as the Cloud Storage Provider for new attachments.
Enter:
the storage account name in the Azure Account Name field;
the container name in the Azure Container Name field;
the directory (tenant) ID in the Azure Tenant ID field;
the application (client) ID in the Azure Client ID field; and
the client secret’s value in the Azure Client Secret field.
Set a Minimum File Size (bytes) for attachments to be stored on Microsoft Azure.