Appointments
Odoo’s Appointments app is a self-service scheduling app that simplifies the process of booking meetings, consultations, or services. Integrated with Odoo’s suite of business apps, it allows companies to automate appointment scheduling, reduce manual coordination, and provide a seamless experience for clients. Appointments can be linked to calendars, CRM opportunities, employee schedules, and more, making it an ideal tool for service-based businesses seeking efficiency and organization.
配置
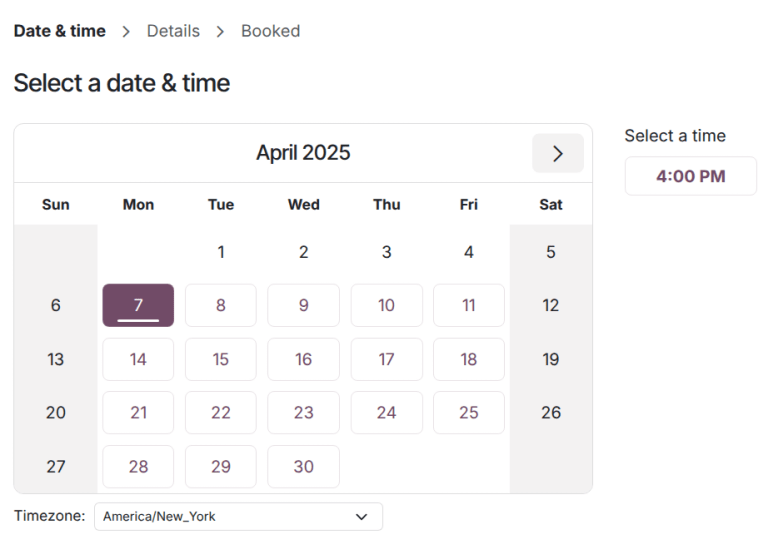
The Appointments app allows for new appointments to be scheduled based on the availability of users, or the availability of resources, such as meeting rooms or seating areas. To create a new resource, or manage existing resources, navigate to . This opens a list of the available resources in the database, as well as their individual capacity.
Resources
Click New to create a new resource. On the blank record, enter a Name for the new resource. In the Capacity field, enter the maximum number of people the resource can accommodate. Then, confirm the Timezone for this resource.
If desired, select one or more Linked Resource from the drop-down. This option designates one or more resources that can be used in combination to handled a bigger demand.
重要
Linked resources are only used when using the auto-assign Assignment Method.
Lastly, add a Description for this resource.
注解
The contents of the Description tab are visible to customers when booking an appointment online.
Appointment type configuration
Before appointments can be scheduled or booked, an appointment type must be created. Navigate to the app dashboard and click New. On the new blank record, enter an Appointment Title, then set a Duration for this appointment type.
Next, set a Pre-Booking Time. This is the minimum amount of time between when an
appointment can be booked and when the appointment can begin. If the Pre-Booking Time is
1 hour, appointments must be booked at least 1 hour in advance.
Example
An appointment type is created for Tennis Courts, with a Duration of 1 hour, and
a Pre-Booking Time of 1 hour. At 02:00 PM, a customer attempts to book an
appointment for the same day at 02:45 pm. The first available time is 04:00 pm.
Select a Scheduling Window:
Select Available now to allow customers to book an appointment immediately. Use the Up to X days into the future field to define how far in advance customers can schedule appointments. For example, if
14is entered, customers cannot book anything more than 14 days from the current date.Select Within a date range to limit bookings to a specific range of dates. After selecting this option, click the From and to fields, and use the calendar pop-up window to customize the date and time range.
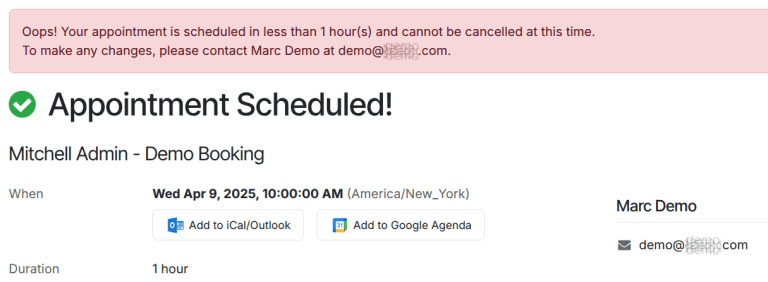
Update the Allow Cancelling field to limit the amount of time before an appointment where a customer can cancel. If this setting is enabled, customers are unable to cancel within the designated time frame.
注解
If a customer does try to cancel within the time frame, they receive an error message with contact information. If the appointment is for a resource, the contact details are for the user that created the appointment type. If the appointment is for a user, the contact details are for the user the appointment is with.
Next, designate whether this appointment type is based on Users or Resources, by selecting the appropriate radio button. If it is based on users, select one or more Users in the drop-down. If it is based on resources, select one or more Resources in the drop-down.
小技巧
User-based appointment types can be used for scheduling sales meetings and demos, as well as recruiting interviews.
Resource-based appointment types can be used for scheduling time in specific rooms or locations.
Selecting Resources in the Availability on field reveals the Manage Capacities option. If selected, the appointment limits the number of participants based on the capacity of the resources selected.
Choose an Assignment Method by selecting the appropriate radio button:
Pick User/Resource then Time: customers select from a list of available users/resources, then select an open time slot.
Select Time then User/Resource: customers choose a date and time, then select from the list of available users/resources.
Select Time then auto-assign: customers select a time slot and are automatically assigned a user/resource.
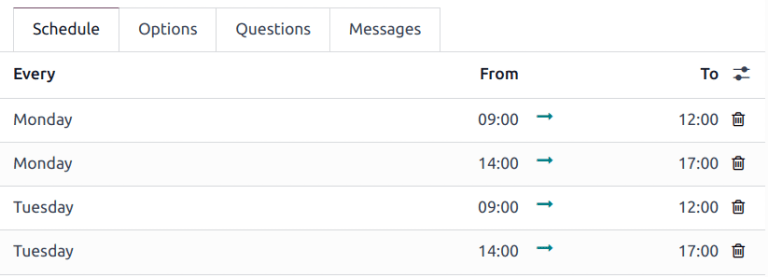
Schedule tab
The Schedule tab is used to outline when this appointment type is to be made available. The settings define the time slots shown on the booking page.
Click Add a line to create a new time frame. Select a day of the week from the Every drop-down menu, then update the times in the From and To fields. Click the (trash) icon to delete an entry. Multiple entries can be included for a single day.
小技巧
If an appointment should not be available at specific times, such as when users are taking lunch, include time slots before and after.
“选项”选项卡
The Options tab is used to customize the display options for this appointment, as well as notification settings for customers and users.
The Front-End Display field determines how the appointment is presented on the website to customers. Select the Show Pictures radio button to publish the default pictures of the user or resources for this appointment on the website.
The Timezone and Location fields automatically populate for resource
appointments, based on where the resource is located. For user-based appointments, the
Location field defaults to an Online Meeting, with a Videoconference Link
automatically generated. If this should not be an online meeting, select a different option in the
Location field.
Tick the Manual Confirmation checkbox to require approval before a meeting is accepted. If this feature is enabled, the appointment time slot is still considered reserved until it is confirmed or rejected. Leave this checkbox blank to automatically accept meetings created from this appointment.
The Create Opportunities feature adds a lead or opportunity to the CRM app for each scheduled appointment, which is assigned to the responsible user. Tick the Create Opportunities checkbox to enable this option.
重要
This field is only visible if the CRM app is installed on the database.
The Reminders field is used to set how customers are to be contacted before the appointment time. Select one or more options from the drop-down, based on the communication method, and the time frame.
Tick the Allow Guests checkbox to grant customers the ability to add additional guests when registering for an appointment.
问题选项卡
The Questions tab can be used to prompt customers for additional information while they are booking an appointment. Click Add a line to add a new question.
On the Create Questions pop-up window, enter the Question, then choose an Answer Type.
Tick the Mandatory Answer checkbox to require customers to answer this question before they are allowed to book an appointment. Click Save & New to add another question, or Save & Close when finished.
Messages tab
The Messages tab is used by the business to provide additional information to customers regarding this appointment type.
重要
The content in the Messages tab is visible to customers and website visitors.
In the Introduction Message field, add a short description of the appointment type. This can include the topic of the appointment, a meeting agenda, or an introduction to the users responsible for the meeting.
The Extra Message on Confirmation is displayed to a customer after they have booked a meeting. Add any additional information here that the customer should be aware of. This can include parking information, last minute rules, or additional instructions.
Publishing an appointment
When an appointment is ready to publish, click the Go to Website smart button at the top of the record. Then, slide the Unpublished icon to Published.