Google Calendar synchronization
将 Google 日历与 Odoo 同步,可同时查看和管理两个平台上的会议(双向更新)。这种整合有助于安排日程,从而避免错过会议。
在Google中设定
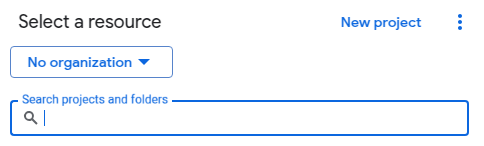
选择(或创建)一个项目
创建一个新的 Google API 项目并启用 Google 日历。首先,访问 `Google API 控制台<https://console.developers.google.com>`_并登录 Google 账户。
注解
如果是首次访问此页面,Google 将提示用户输入国家/地区并同意服务条款。请从下拉列表中选择一个国家,并同意 ToS(服务条款)。
接下来,单击:guilabel:选择项目`并选择(或创建)一个 API 项目,以便在其中配置 OAuth 和存储凭据。单击 :guilabel:`新建项目。
Give the API project a clear name, like Odoo Sync, so it can be identified. Then click the
Create button.
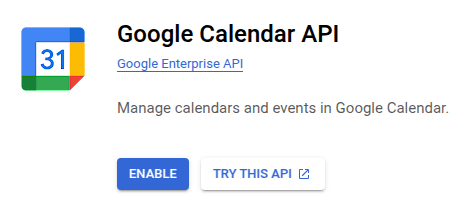
启用 Google 日历 API
Now, click on Enabled APIs and Services in the left menu. Select Enabled APIs and Services again if the Search bar does not appear.

然后,使用搜索栏搜索 Google 日历 API,并从搜索结果中选择 Google 日历 API。点击 启用。
OAuth 同意屏幕
Now that the API project has been created, OAuth should be configured. To do that, click on OAuth consent screen in the left menu, then click the Get started button.
警告
个人 Gmail 帐户只允许使用**外部**用户类型,这意味着 Google 可能需要批准或添加*范围*。不过,使用*Google 工作空间*账户可以使用**内部**用户类型。
请注意,当 API 连接处于*外部*测试模式时,无需获得 Google 批准。该测试模式下的用户限制为 100 个。
Follow the proceeding steps, in order:
In App Information, type
Odooin the App name field, then enter the email address for the User support email field and click the Next button.In Audience, select External, then click the Next button.
In Contact Information, enter the email again, then click the Next button.
In Finish, tick the checkbox to agree to Google API Services: User Policy. For the last step, click the Create button.
Test users
To give users the ability to sync with personal Gmail accounts, they must be set as a test user. Setup test users by going to Audience in the left-side menu and clicking the Add users button in the Test users section. Enter any desired user emails, and click the Save button.
创建凭据
The Client ID and the Client Secret are both needed to connect Google Calendar to Odoo. This is the last step in the Google console. Begin by clicking Clients in the left menu. Then, click Create Credentials, and select OAuth client ID, Google will open a guide to create credentials.
在 下,为 应用类型 字段选择 网站申请,并为 名称 键入 我的 Odoo 数据库。
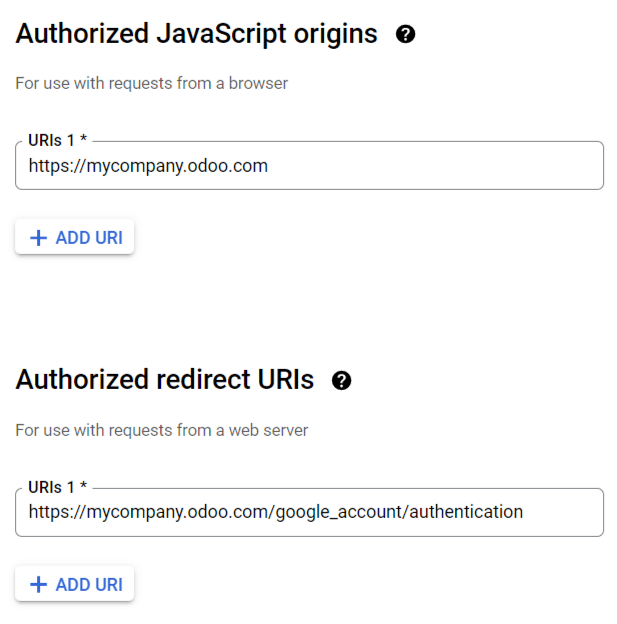
在 经授权 JavaScript Origins 部分,单击 + 添加 URI 并键入公司的 Odoo 完整 URL (统一资源定位符) 地址。
在 经授权重新定向 URIs 部分,单击 + 添加 URI,然后键入公司的 Odoo URL(统一资源定位符) 地址,后面跟上`/google_account/authentication`。最后,点击 创建。
A Client ID and Client Secret will appear, save these somewhere safe.
设置Odoo
Once the Client ID and the Client Secret are located, open the Odoo database and go to to find the Google Calendar feature. Tick the checkbox labeled Google Calendar.
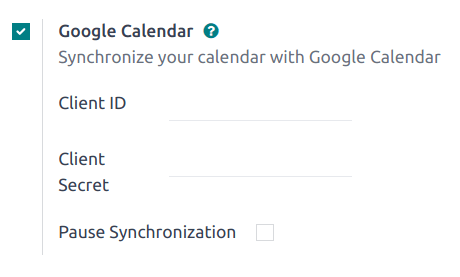
接下来,将 Google 日历 API 证书页面中的 客户 ID 和 客户密钥 复制并粘贴到 Google 日历 复选框下方的相应字段中。然后,单击 保存。
注解
Tick the Pause Synchronization checkbox to temporarily pause events from being updated. This allows for testing and troubleshooting without removing credentials or uninstalling the synchronization. To resume the sync, clear the checkbox and save.
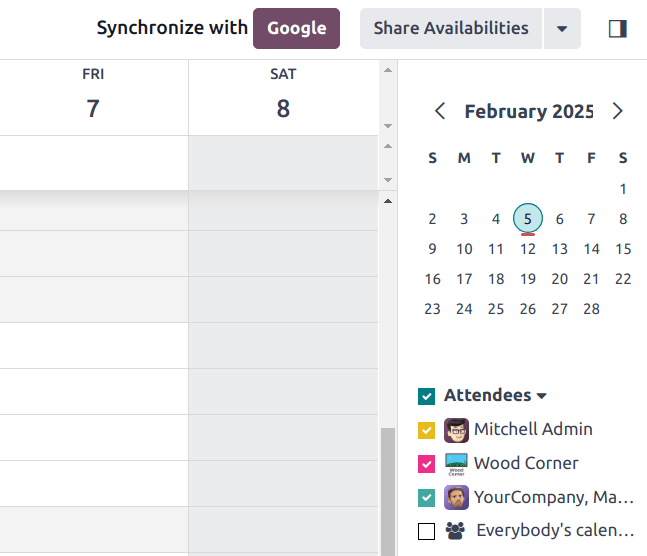
在 Odoo 中同步日历
最后,打开 Odoo 中的 应用程序,点击 Google 同步按钮,将 Google 日历与 Odoo 同步。
注解
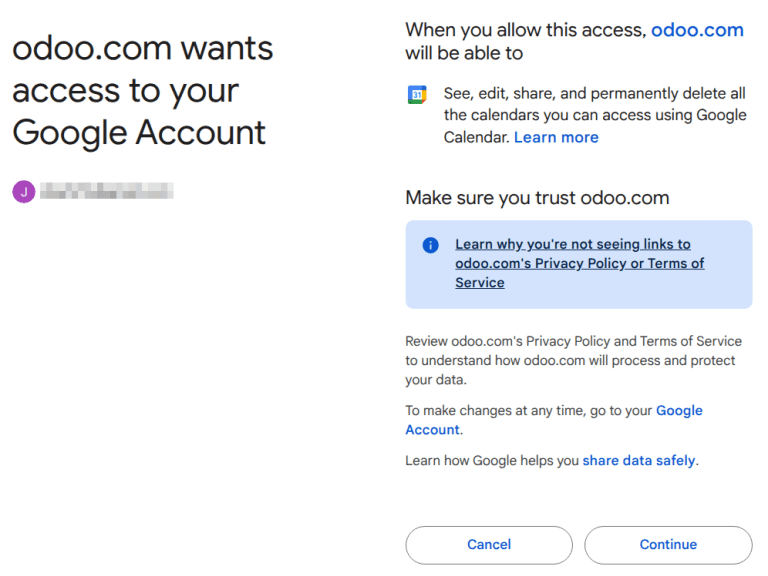
When syncing Google Calendar with Odoo for the first time, the page will redirect to the Google Account. From there, select the Email Account that should have access, then select Continue (should the app be unverified), and finally select Continue (to give permission for the transfer of data).
现在,Odoo 日历已成功与 Google 日历同步!
警告
Odoo 强烈建议在测试数据库和测试电子邮件地址(不用于任何其他目的)上测试 Google 日历同步,然后再尝试将所需的 Google 日历与用户的生产数据库同步。
一旦用户将 Google 日历与 Odoo 日历同步后:
在 Odoo 中创建活动会导致 Google 向所有参与者发送邀请。
在 Odoo 中删除活动会导致 Google 向所有参与者发送取消通知。
将联系人添加到活动会导致 Google 向所有参与者发送邀请。
从活动中删除联系人会导致 Google 向所有参与者发送取消通知。
在*Google 日历*中创建活动时,可在提示发送邀请电子邮件时选择 不发送,而无需发送通知。
故障排除同步
有时*Google 日历*账户可能无法与 Odoo 正确同步。同步问题可在数据库日志中看到。
在这种情况下,账户需要进行故障排除。可使用 重置账户 按钮进行重置,该按钮可通过导航至 访问。然后,选择要修改日历的用户,并点击 日历 选项卡。
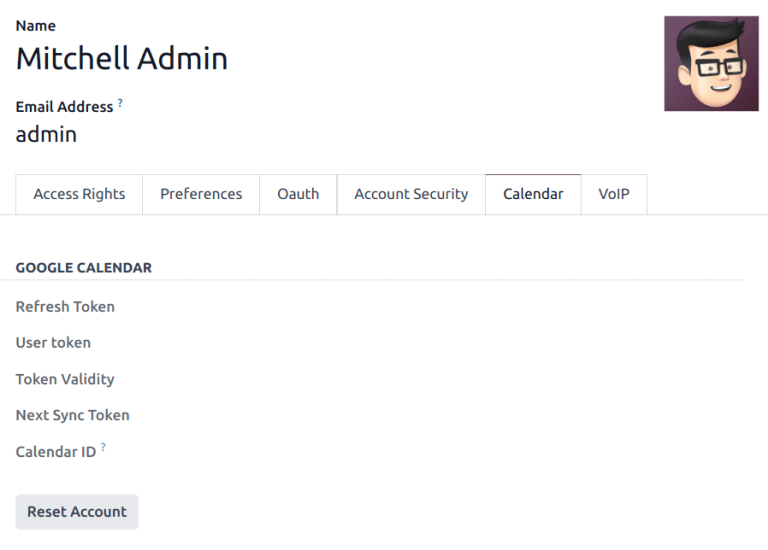
然后,在正确的日历下点击 重置账户。
重置选项
以下重置选项可用于排除 Google 日历与 Odoo 同步的故障:
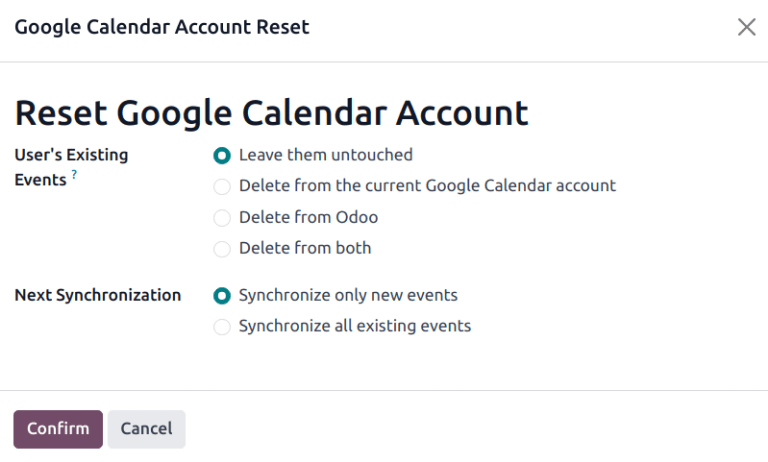
用户现有活动:
不做改动:不更改活动。
从当前的 Google 日历帐户中删除:从 Google 日历 中删除事件。
从 Odoo 中删除:从 Odoo 日历中删除活动。
同时删除:从 Google 日历 和 Odoo 日历中删除活动。
下一次同步:
只同步新活动:同步*Google 日历*和/或 Odoo 日历上的新活动。
同步所有现有活动:同步*Google 日历*和/或 Odoo 日历上的所有活动。
选择后点击 确认 以修改用户活动和日历同步。
谷歌OAuth常见问题解答
At times there can be configuration errors that occur, and troubleshooting is needed to resolve the issue. Below are the most common errors that may occur when configuring the Google Calendar for use with Odoo.
生产与测试发布状态
选择 生产 作为 发布状态 (而不是 测试)会显示以下警告信息:
在 OAuth 同意屏幕通过验证之前,OAuth 的敏感范围登录次数仅限 100 次。这可能需要几天的验证过程。
要更正此警告,请导航至 `Google API 平台<https://console.cloud.google.com/apis/credentials/consent>`_。如果 发布状态 为 生产中,请点击 返回到测试 以更正问题。
无新增测试用户
如果没有测试用户添加到 OAuth consent 屏幕,则会弹出 错误 403: access_denied。
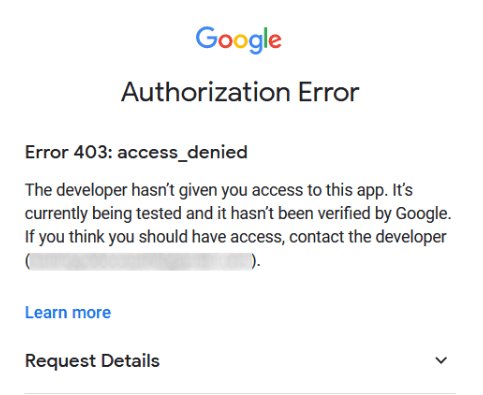
要纠正此错误,请返回 APIs & Services 下的 OAuth consent screen 并在应用程序中添加测试用户。添加要在 Odoo 中配置的电子邮件。
应用类型
创建凭证(OAuth 客户 ID 和 客户密钥)时,如果在 应用类型 中选择了 桌面应用程序,则会出现 授权错误`(:guilabel:`错误400:redirect_uri_mismatch)。
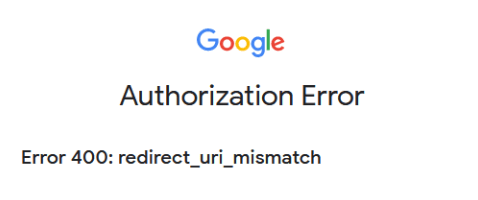
要纠正此错误,请删除现有凭证,并在 应用类型 中选择 网络应用 创建新凭证。
然后,在 授权重定向 URI 下,单击 添加 URI 按钮,并在字段中键入: https://yourdbname.odoo.com/google_account/authentication,确保将 URL 中的*yourdbname*替换为**真实的** Odoo 数据库名称。
小技巧
确保域(在 URI 中使用:https://yourdbname.odoo.com/google_account/authentication)与 web.base.url 系统参数中配置的域完全相同。
激活 开发者模式 并导航至 。