模型和应用程序
模型决定数据库的逻辑结构、数据的存储、整理和操作方式。换言之,模型是可以与其他表格链接的信息表。模型通常代表一个业务概念,例如 销售订单 、 联系人 或 产品 。
模块和应用程序包含各种元素,如模型、视图、数据文件、网站控制器和静态网站数据。
注解
所有应用程序都是模块。较大的独立模块通常称为应用程序,其他模块则通常用作应用程序的附加组件。
建议功能
使用Studio创建新模型或应用程序时,您可以选择添加多达14个功能,以加快创建过程。这些功能将字段、默认设置和视图捆绑在一起,通常用于实现标准功能。多数上述功能可在之后添加,但提前添加可使模型创建过程更容易。此外,在某些情况下,上述功能会相互作用,以提高实用性。
详细联系方式
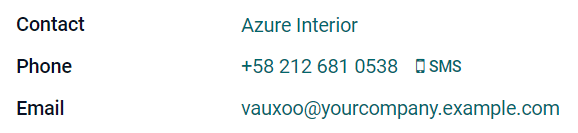
Selecting Contact details adds to the Form view a Many2One field linked to the Contact model and two of its Related Fields: Phone and Email. The Contact field is also added to the List view, and the Map view is activated.
Example
用户分配
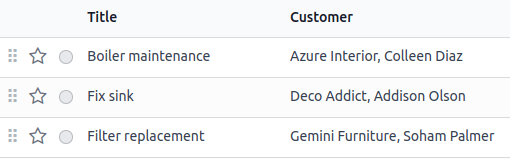
Selecting User assignment adds to the Form view a
Many2One field linked to the Contact model, with
the following Domain: Share User is not set to only allow the selection of Internal
Users. In addition, the many2one_avatar_user widget is used to display the user’s
avatar. The Responsible field is also added to the List view.
Example

日期和日历
Selecting Date & Calendar adds to the Form view a Date field and activates the Calendar view.
日期范围和甘特图
Selecting Date range & Gantt adds to the Form view two Date fields next to each other: one to set a start date, the other to set an end date, using the daterange widget, and activates the Gantt view.
渠道阶段
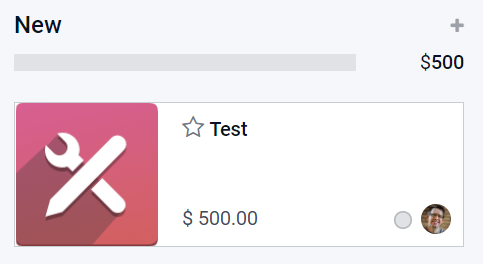
Selecting Pipeline stages activates the Kanban view, adds several fields such as Priority and Kanban State, and three stages: New, In Progress, and Done. The Pipeline status bar and the Kanban State field are added to the Form view. The Color field is added to the List view.
注解
Pipeline stages 功能可以后续添加。
图片
Selecting Picture adds to the top-right of the Form view an Image field.
注解
图片 功能可以之后添加。
行
Selecting Lines: adds to the Form view a Lines field inside a Tab component.
备注
Selecting Notes adds to the Form view an Html field using the full width of the form.
货币价值
Selecting Monetary value adds to the 窗体 and 列表 views a Monetary field. The 图形 and 透视表 views are also activated.
注解
视图中添加或隐藏*币种*字段。
公司
Selecting Company adds to the 窗体 and 列表 views a Many2One field linked to the Company model.
注解
该功能仅适用于多公司环境。
自定义排序
选择 自定义排序 会向:ref:List view <studio/views/multiple-records/list> 添加拖动手柄图标,用于手动完成记录。
Example
图表
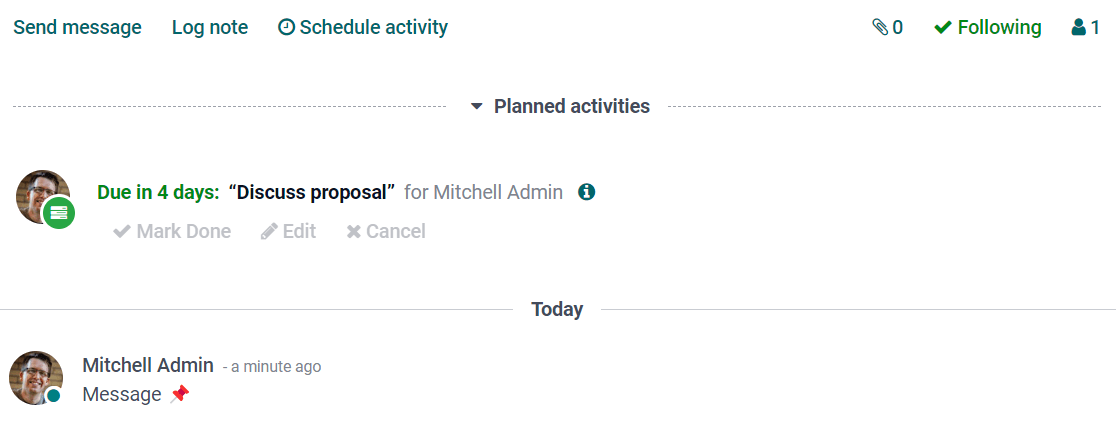
选择 聊天窗口 会向:ref:Form view <studio/views/general/form> 添加聊天窗口功能(发送信息、记录笔记和计划活动)。
注解
聊天窗口 功能可以之后添加。
Example
归档
导出和导入自定义项
When you do any customization with Studio, a new module named studio_customization is
added to your database. You can export this module as a ZIP file using the Studio Export
function. The module can then be imported into another Odoo database. This may be useful, for
example, when setting up a new module or for training purposes.
注解
Exporting and importing customizations in this way, rather than using the standard Odoo export and import functions, means data is imported in a logical way. For example, if the module contains customers and sales orders, the customers are created first, since these are required for the sales orders to be created.
Export customizations
To export customizations, click the (Toggle Studio) button on the main Odoo dashboard, then Export, then either:
download all Studio customizations by clicking the Export button; or
choose what data to export by clicking Configure data and demo data to export.
Configure data to export
To select specific models to export, click New on the Studio Export screen, then start typing the name of the relevant model or select it from the list.
小技巧
Click Preset to see a list of all models in your database with records that have been modified using Studio and all custom models created using Studio. To configure one of these models for export, click on the model to open it and make the required changes.
Tick the following options as relevant:
Demo: if the exported records should be considered as demo data when imported.
Attachments: if attachments related to exported records should be included in the export.
Updatable: if the exported records should be able to be updated during a module update.
If necessary, edit the Domain to determine which of the model’s records should be exported. To do so, click the Edit Domain button or (Modify filter) then Edit Domain, as appropriate. Proceed to make any required changes.
After configuring a model for export, click Studio Export to return to the main screen. To download a ZIP file with the customizations for all the listed models, click Export.
注解
It is not necessary to select one or more models as all listed models will be included in the export. To remove a model from the export, select it and click the Actions button then Delete.
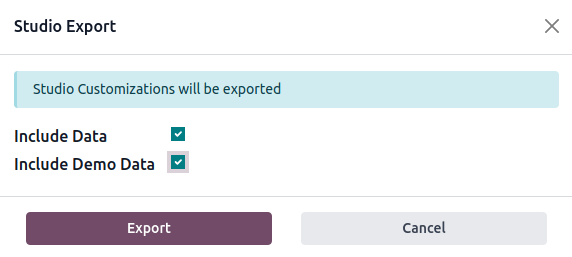
In the Studio Export window:
leave the checkboxes unticked to export only the customizations done with Studio.
tick Include Data to include data from the selected models in the export.
tick Include Demo Data to include data from the selected models that is flagged as demo data. Ticking this option also ticks Include Data.
Click the Export button to download the ZIP file.
Import customizations
警告
Before importing, make sure the destination database is on the same Odoo version and contains the same apps and modules as the source database. Studio does not add the underlying modules as dependencies of the exported module.
To import and install Studio customizations in another Odoo database:
Connect to the destination database.
Click the (Toggle Studio) button on the main Odoo dashboard, then Import.
Upload the exported ZIP file. If demo data should be imported, tick Load demo data.
Click Install.