自助下单
The self-ordering feature allows customers to browse your menu or product catalog, place an order, and complete payment using their mobile device or a self-ordering kiosk.
配置
Feature activation
To enable this feature and select a self-ordering type, access the POS settings, scroll down to the Mobile self-order & Kiosk section, and select a Self Ordering type under the QR menu & Kiosk activation section.
You can choose from:
Select QR menu or QR menu + Ordering to give customers access to your menu or product catalog by scanning a QR code on their personal device. The latter also allows them to place an order and make a payment.

Click Print QR Codes to download a .pdf document with the generated QR codes.
Click Download QR Codes to download a compressed file with the generated QR codes.
注解
In restaurants, printing or downloading QR codes generates as many QR codes as the number of available tables. In shops, it generates only one generic QR code.
小技巧
To customize QR codes,
Scan the relevant QR code to acquire its URL.
Use a QR code generator (e.g., QR code monkey or QR code generator) to create a custom QR code.
When Kiosk is selected, customers can access the menu or product catalog, place orders, and pay from a self-ordering kiosk.
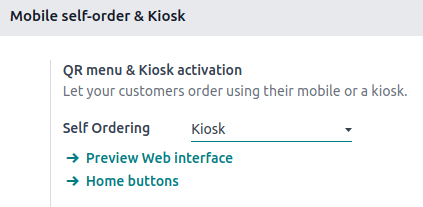
Once a self-ordering type is selected, the additional settings update to fit the selected type’s needs.
Additional settings
The Home buttons are displayed on the kiosk or mobile device interfaces when customers are self-ordering. To set them up, click Home buttons. Then,
Click New to add a new button.
Set the Label.
Enter a URL preceded by
https://to redirect customers to a specific URL when clicking the button. For instance, you might want to redirect them to a campaign video for a new product or to a contest page.In the same URL column, enter
/productsto create a button that redirects customers to the product catalog.Select the Points of Sale to ensure this button only appears on the selected POS’ self-ordering interface.
Select a predefined Style from the dropdown menu.
注解
Leaving the Points of Sale field empty shares the button with all POS.
The Preview column automatically updates, giving you a glimpse of the button’s appearance based on its configuration.
Set where the service occurs by selecting Table or Pickup zone under the Service field.
Define when and how customers pay in the Pay after field. Customers can pay after Each meal or for Each order.
The service location and payment options available depend on the type of self-ordering service and POS:
QR menu + Ordering:
Restaurants: Customers can be served at their table or the pickup zone.
When served at their table, they can pay after each meal or each order.
When served at the pickup zone, they can only pay after each order.
Shops: Customers can only be served at the pickup zone and pay after each order.
Regardless of the type of POS, customers can pay online or using any configured payment method.
Kiosk:
This option allows you to enable multiple languages for the self-ordering interface. The suggested languages are those already installed in Odoo. To expand the selection, add more languages:
Click Add Languages.
Add as many languages as needed to the Languages field.
Click Add.
Add those languages to the Available field.
更多内容
Splash screens are introductory screens displayed when the self-ordering interface or kiosk is launched. They typically contain branding, welcome messages, or usage instructions.
To add a splash screen image, click Add images, select and open an image.
To remove a splash screen image, hover over the image and click (Delete).
注解
You can add multiple splash screen images at once.
激活此设置,以便 根据顾客是堂食还是外带订单调整税率。然后、
用现有的 备选财务规则 填写字段;
填写字段并点击 创建和编辑,创建并设置新的财务规则;或
点击 财务状况,创建并设置新的财务状况。
更多内容
预览
在向客户提供自助订购功能之前,请先查看界面,以确保正确应用所有设置。点击 预览网络界面 下的 自助订购 字段,以确保正确应用所有 附加设置 设置。
使用指南
在 POS 用户端,通过以下方式访问自助订购界面
扫描下载或打印的二维码;或
点击 POS 卡上的 )图标,然后点击 移动菜单。
在客户端
通过扫描下载或打印的二维码进入自助订购界面。
点击 home 按钮 进入菜单或目录。
选择项目并点击 订购 下订单。
按照屏幕上的说明分配餐桌并支付订单。
在 POS 用户端,
点击 开启自助终端。
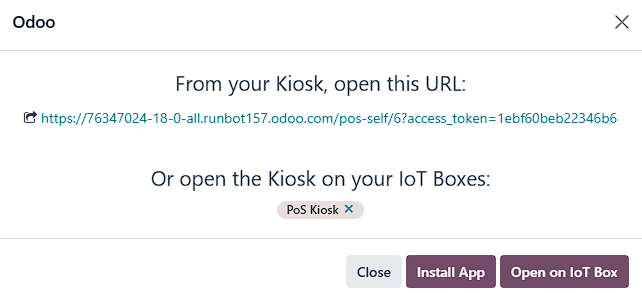
在自助订餐终端上打开提供的 URL。
点击提供的 URL,在新标签页中打开自助终端;
Click Install App to install the kiosk module on your self-ordering kiosk; or
Click Open on IoT Box if your kiosk is connected to an IoT system
注解
Once a session is open, Start Kiosk switches to Open Kiosk on the POS card.
Click Open Kiosk on the POS card to reopen the popup window and access the self-ordering interface.
在客户端
Click the home button from a self-ordering kiosk to reach the menu or product catalog.
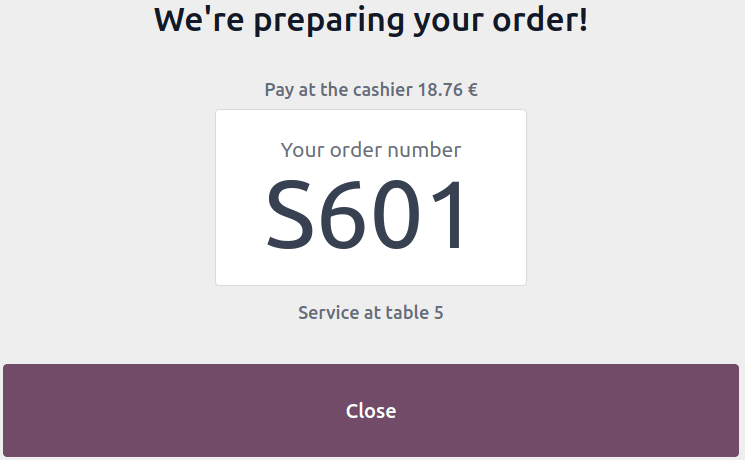
选择项目并点击 订购 下订单。
按照屏幕上的说明分配餐桌并支付订单。
重要
A POS session must be open for customers to place an order.
Once an order is placed, it is automatically sent to the preparation screen and added to the list of POS orders.