供应商
Before products can be added to the Lunch app, the restaurants that provide the food must be configured.
To add a new vendor, first navigate to . Here, all currently configured vendors for the Lunch app appear in a default Kanban view. To change to a list view, click the (list) icon in the top-right corner.
注解
No vendors are preconfigured in the Lunch app, so all vendors must be added to the database.
To add a new vendor, click the New button in the top-left corner, and a new lunch supplier form loads.
Fill out the following fields on the vendor form:
Vendor information
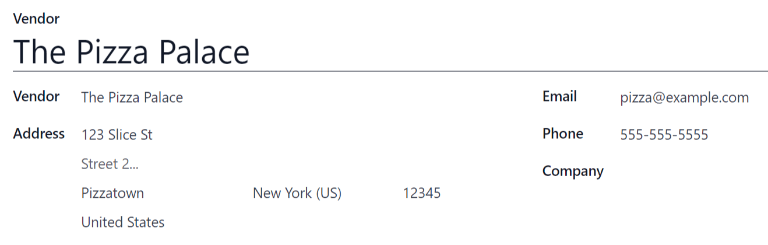
Vendor: enter a name for the vendor.
Vendor (beneath the line for vendor name): select the vendor from the drop-down menu. If the vendor has not already been entered in the system, type in the vendor name, and click either Create “new vendor name” to add them. Alternatively, click Create and edit… to create the vendor, and edit the vendor form. The vendor form allows for more detail, aside from the name, to be entered, such as contact information.
注解
If a selection is made to the drop-down Vendor field, the Vendor text field (above, for the vendor’s name) updates with the name of the vendor chosen from the drop-down menu.
The list of vendors that is presented in the drop-down menu is pulled from the Contacts application.
Address: enter the vendor’s address in the various fields.
Email: enter the vendor’s email.
Phone: enter the vendor’s phone number.
公司: 如果该供应商只对特定公司开放,请从下拉菜单中选择该公司。如果此字段留空,则供应商的项目可供**所有**公司使用。
可用性
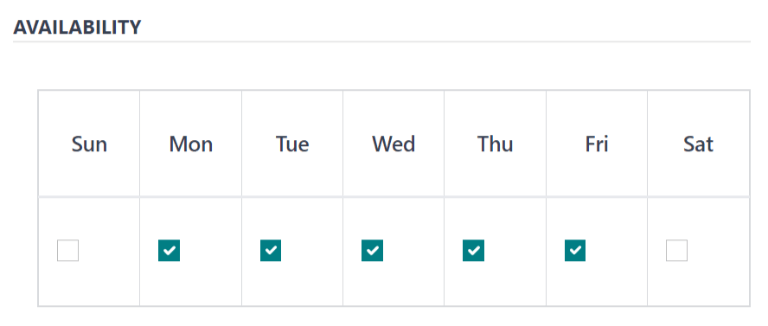
The AVAILABILITY section presents a table with two rows. The days of the week populate the top row, and the bottom row has checkboxes. Tick the corresponding checkbox for each day of the week the vendor is available.
By default, Monday through Friday are ticked.
订单
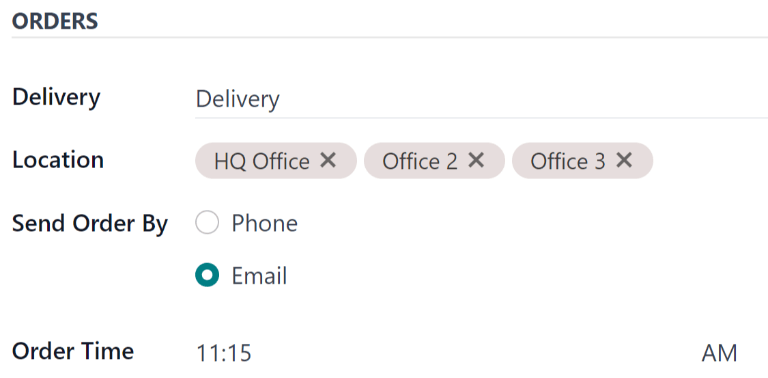
The ORDERS section of the vendor form details which locations the vendor is available for, in addition to how and when orders are placed and received.
Delivery: using the drop-down menu, select Delivery if the vendor delivers to the office, or select No Delivery if orders must be picked up.
Location: select which locations are able to order from this vendor. Multiple locations can be selected. If this field is left blank, all locations can order from the vendor.
注解
An
HQ Officelocation is created by default when creating a database, and is available to select from the list.Send Order By: click the radio button to select how orders are sent to the vendor. The available options are Phone or Email.
Order Time: this field only appears if Email is selected in the Send Order By field. Enter the time that an order must be emailed for it to be accepted. Enter the time in the following format:
HH:MM. Then select either AM or PM from the drop-down menu, next to the time field.
额外
When ordering an item in the Lunch app, optional extra items, sometimes referred to as add-ons, can be shown. These can be configured in any manner that suits the products being offered.
By default, Odoo allows for three types of extra items, which can be thought of as categories. By
default, the first type (or category) of add-ons is labeled Extras, the second is labeled
Beverages, and the third is labeled Extra Label 3.
重要
When configuring the extras, it is important to keep in mind that all the extras configured appear for every item offered by the vendor. That means that only items which apply to all products from the vendor should be added.
Configure extras
Enter the following information for each of the three available extra sections:
Extra (#) Label: enter a name for the type of extra, such as
Toppings. This can be thought of as a category.Extra (#) Quantity: select how the extras are selected. The options are:
None or More: select this if the user is not required to make a selection.
One or More: select this to require the user to make at least one selection.
Only One: select this to require the user to make only one selection.
Add extras
为额外类别配置标签和数量后,必须为每个类别添加单个额外项目。
点击额外类别右侧列表底部的 添加行 。为添加的每个项目输入 名称 和 价格 。如果没有成本,价格可以保持为 $0.00 。这种情况常见于一次性银器或调味品等物品。
Example
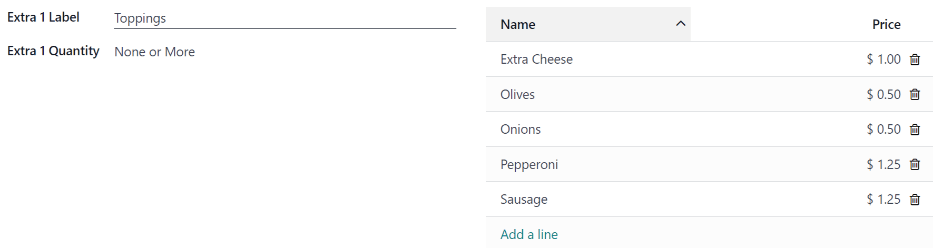
如果比萨店只提供个人比萨,请查看其额外配置如下:
第一个额外配置是针对他们提供的各种馅料。 Extra 1 标签 被设置为 Toppings ,而 Extra 1 数量 被设置为 不限或更多 。 然后添加了各种馅料,并标注了相应的价格。
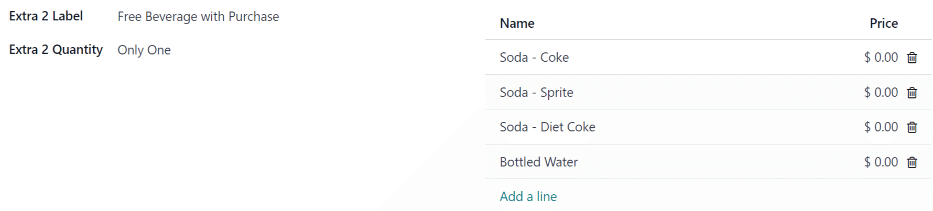
任意消费即可获得比萨店免费饮料。设置时,将 Extra 2 标签 设为 饮料 ,将 Extra 1 数量 设为 唯一 。添加各种饮料选择,每种饮料的成本仍为零。